One takes
- A beautiful container with water drainage, the diameter of which is at least as large as the crown diameter of the plant.
- Expanded clay and non-woven material.
- Special, structurally stable potting soil.
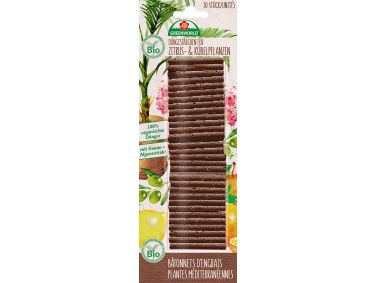
- Long-term fertiliser for mixing into the soil. Or fertiliser sticks.
- Liquid fertiliser for citrus plants and tub plants.
- Watering can. Scissors, tying material if necessary.
Repotting

Check whether the holes in the bottom of the container are passable and that water drainage is guaranteed.

Pour a layer of expanded clay (approx. 5 cm) into the bottom of the container and place non-woven material over it. Then pour in some potting soil.
If necessary, trim the tub plant and remove any dead parts. Remove from the old container. Cut and loosen strongly rooted root bales.

Place the plant in the new container so that the surface of the root bale is as high as before. Fill up with potting soil all around the plant. Work long-term fertiliser into the top layer of soil. Water generously.

Maintenance

The water requirement of the tub plants is high on sunny, warm days. They must be watered regularly. Automatic irrigation systems are ideal.

As soon as the nutrients in the container have been used up (take note of the product information), the plant be refertilised. This can be done with solid fertiliser, fertiliser sticks, or liquid fertiliser.

Non-perennial plants (citrus, bougainvillea, etc.) must be moved to a sheltered winter area before the first frost sets in. The area should be bright with a temperature around 10 °C. Before placing them in the winter area, check plants for parasite infestation and remove any existing parasites.

As soon as the danger of night frost in spring is over, the tub plants can be moved outside again (be careful of sunburn in the first few days!). If necessary, they are trimmed and given long-term fertiliser.

Winter period
Tub plants require little water and no fertiliser in the winter. The wintering room should be ventilated regularly. The lighter it is, the better the tub plants can survive over the winter period.
Winter holiday
Many garden centres and nurseries offer a wintering service for pot plants. The plants spend the winter in a greenhouse under ideal light and temperature conditions.
Perennials
There are also perennial tub plants (conifers and others). They must be placed in frost-proof containers. To avoid rapid freezing and thawing, the containers are wrapped in non-woven material, jute, etc. in the winter.
Recommendations


ASB Greenworld Premium Ballino Compact Citrus Soil, 25 L
Practical, convenient, compact: Special soil for all Mediterranean pot plants such as citrus …
ASB Greenworld Premium Citrus Plant Food, 500 ml
NPK 9-3-5 + trace elements Liquid fertilizer with nutrient ratio specially formulated to the …
BIO Fertilizer Spikes for Citrus & Container Plants, 30 pcs.
Fertilizer spikes for mediterranean container plants. Easy to use: You don’t have to take care on …


